Cycling the Shimanami Kaido from Onomichi to Imabari
One of my biggest accomplishments on my Career Break trip to Japan was cycling the Shimanami Kaido しまなみ海道, a route that covered 76km across 6 islands over 2 days, across the Seto Inland Sea. The journey was absolutely stunning and a major highlight of my 4 weeks in Japan, but it did take some planning and effort to accomplish. I put together this Shimanami Kaido guide from my experience to help you plan your own epic adventure.
Last Updated on 5 July, 2024

Pre-trip considerations
Things to think about before you embark on an epic cycling journey.
How fit do you need to be to cycle the Shimanami Kaido?
Anyone who knows me can tell you that I am lazy. I think of it as “dislikes expending energy when I don’t have to” but I tend to avoid hardcore outdoorsy activities like serious hiking and camping because all that work isn’t really my idea of a holiday. I’m pretty much a leisure cyclist – I enjoy cycling to get around and see a city or a small area, but I’m not the sort to do a full-on cycling trip.
But the Shimanami Kaido is a pretty popular cycling route that is considered one of the things to do when you are in central Japan, so I put it down as one of my must-tries.
Route Planning
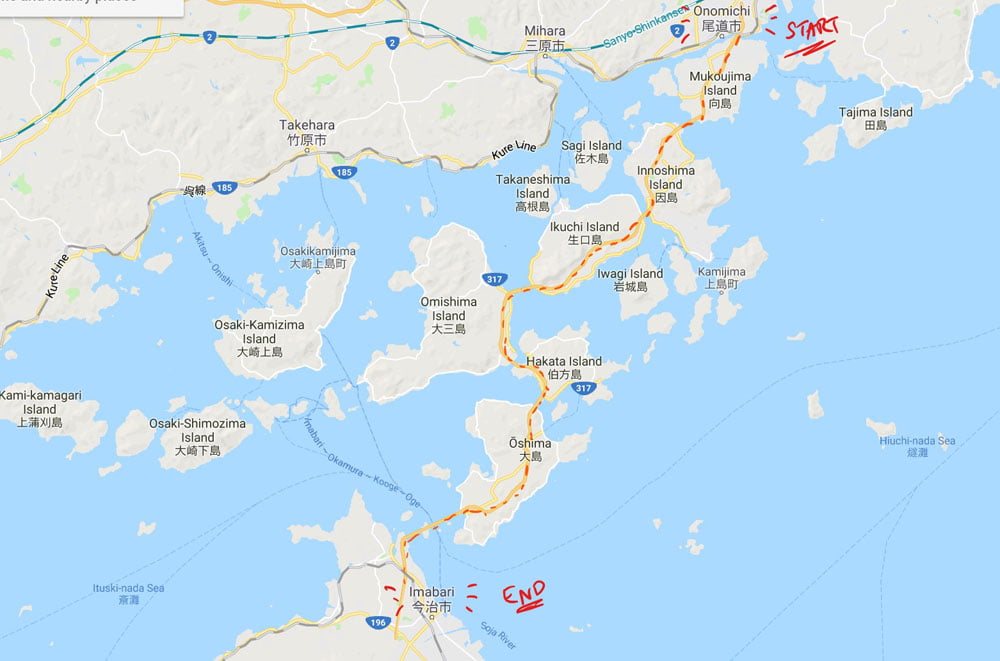
The Shimanami Kaido connects the Chugoku (Western part of the main Honshu Island) and Shikoku regions across the Seto Inland sea via a link of various islands and bridges and is also known as the Nishiseto Expressway. The recommended route totals 76km and it can be covered in a day, but if you do that, you don’t get much time to stop and look at stuff along the way. Many people take a detour along the way, or what I did was to break my trip up with an overnight stay so I could take it slow.
The two main towns on either end of the Shimanani Kaido are Onomichi (Chugoku) and Imabari (Shikoku). It seems from my research that most people cycle North to South – i.e. from Onomichi to Imabari – which is what I did as well and that’s what you will read about in this article, but you can cycle in the other direction as well.
There is a comprehensive English website which you can refer to for more information from the official sources. You can download this map or pick up a physical copy at the bike rental or tourism offices.
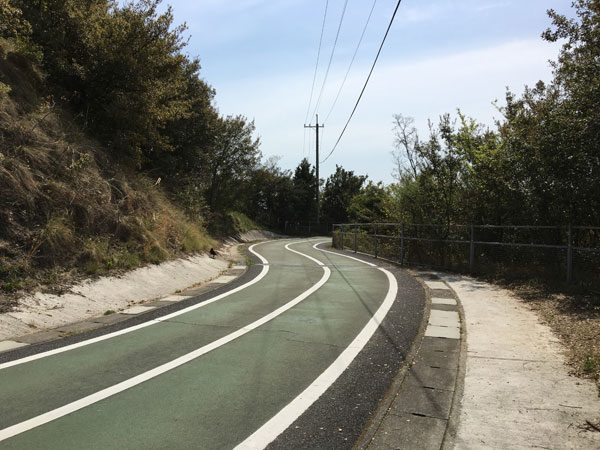
Don’t worry about getting lost as the recommended basic route is quite clearly marked out in blue and white signs on the roads, so you’ll be okay as long as you follow the blue line. The map has also some recommended intermediate and advanced routes as well that deviate from the blue line but are easy to navigate via maps and road signs – these routes may require cycling for much longer distances or more slope encounters.

My Shimanami Kaido route
My initial plan was a 2D1N journey:
- Day 1: Rent bike from Onomichi, cycle to Setoda Sunset Beach on Ikuchijima. Stay overnight at Setoda
- Day 2: Setoda on Ikuchijima to Imabari JR station, take train to next stop Matsuyama cycle
However, the weather reports seemed pretty insistent that the weather on the day of my cycling was going to be terrible – I had experienced a crazy downpour in Naoshima which would have been dreadful to cycle in, so what I ended up doing was a 3-day journey instead:
- Day 1: Rent bike from Onomichi, cycle to Setoda on Ikuchijima. Take ferry from Setoda port back to Onomichi and return bike in evening. Overnight at Onomichi.
- Day 2: Chill in day (when it was supposed to rain), take late afternoon ferry from Onomichi back to Setoda port on Ikuchijima. Car transfer from ferry terminal to Setoda Sunset Beach. Overnight at Setoda.
- Day 3: Quick walk and rent bike from Setoda Sunset Beach, cycle to Imabari JR station, take train to next stop Matsuyama.
The most annoying part about all that is that the weather turned out to be pretty good on the day it was supposed to rain, and it only poured in the evening when I would already have made it to the guesthouse. On the plus side, I had an extra day for my muscles to recuperate. That’s what happens when your plans are fixed early and you are too lazy to change them!
Destinations along Shimanami Kaido route
Here are some tips and recommendations for the various islands that I cycled through based on my own experience. You can also read a very abbreviated version on another article I did for JapanTravel about the bridges along the Shimanami Kaido.
- Onomichi 尾道市
- Mukaishima 向島
- Innoshima 因島
- Ikuchijima 生口島
- Omishima 大三島
- Hakatajima 伯方島
- Oshima 大島
- Imabari 今治市
Onomichi 尾道市
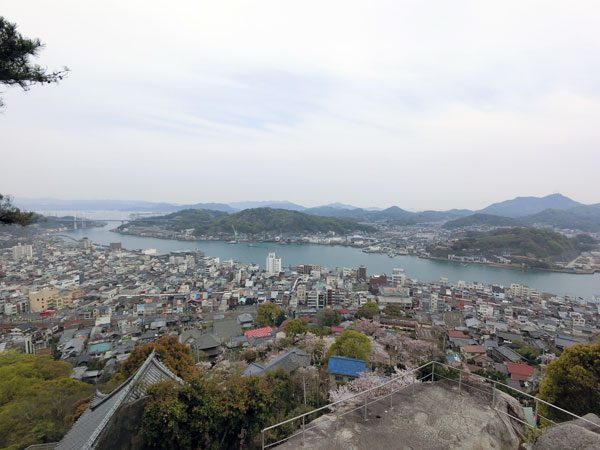
Onomichi is a small town which is easily reached by train to Onomichi JR station. The town’s attractions include a Temple Walk along the hillside that overlooks the straits – the highlight here is Senkoji Temple and Senkoji Park, both of which you can walk to but if you’re feeling a bit lazy, take the ropeway up. You can also check out Onomichi Hondori, a very long stretch of covered shopping street lined with shops and eateries.


Onomichi train station is really close to the port area where you need to take a short 5-min ferry connection (110 JPY including your bike, pay on the boat) to Mukaishima just across the small straits, which is where the actual cycling starts. The bridge that connects Onomichi to Mukaishima is for cars only, so pedestrians and cyclists have to take the ferry.
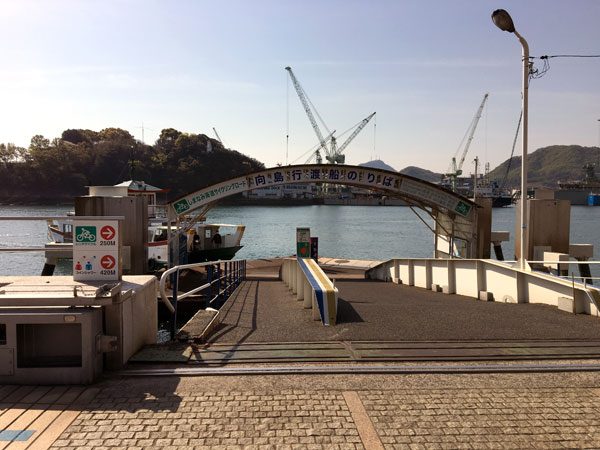
I personally think 1-2 days spent in Onomichi is sufficient for most travellers. I stayed 3 nights and on hindsight, I think 2 nights would have been just nice. Other areas nearby that I would recommend include taking a day trip out to quaint Tomonoura, or perhaps heading to nearby Fukuyama.
Mukaishima 向島
The starting point of the Shimanami Kaido! I wheeled my bike off the ferry and started cycling proper at around 9am. The Shimanami Kaido route starts off through a small town area and if you follow the blue line (aka recommended route), it goes westward and flanks the shore for coastal views. Slowly the houses and town disappear and you get some nice scenic views.
There is an Orchid Centre and an observatory deck if you are looking to do some sightseeing, but those are found on the intermediate/expert routes so I skipped those.
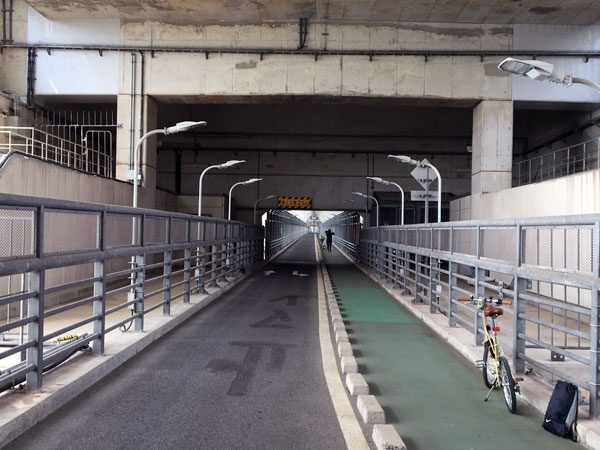
As you head towards the next island, you will see a red bridge that will excite you at first, but note that’s not the one you will actually cross. The first bridge crossing is a long white suspension bridge called Innoshima Bridge. It is rather unusual because pedestrians, cyclists and motorcyclists cross under the bridge at a level below the road that the cars use – most of the other bridge crossings have bikes and cars cross on the same level.

Innoshima 因島
At this point, I’m experiencing euphoria as I rolled along my first down-slope while exiting Innoshima bridge. In Innoshima, there is a small amenity park called Innoshima Memorial Park in the area just past the bridge where you can stopover for a quick break if you need one.

I stopped for a lunch break at the 711 here, and met a more serious cyclist who was spending 5 days on the route and had his own bike and everything. I would meet him again in Matsuyama (hello R if you see this!)
There is also an expert uphill route eastwards with Innoshima Suigun Castle and a flower park Innoshima Flower Centre, but it looked like quite a long detour of the recommended route, so I skipped those and continued on westwards. The route turned inland past a busy port area before skirting the coastline again as it neared the next bridge.
Ikuchijima 生口島
Ikuchijima, aka the halfway point! The recommended route goes westward along the coastline, and on this island I made my first attraction stops to stretch my legs a little after all that cycling:
First I checked out the Hirayama Ikuo Museum (entrance: 800 JPY/S$10). The artist Hirayama Ikuo is famous for his works which are inspired by the Seto Inland Sea area. Personally, I found his art ok but it wasn’t something I fell in love with, though I liked some of his earlier sketches more than his finished work. The aircon interior was a nice bonus and a good way to cool down quickly.
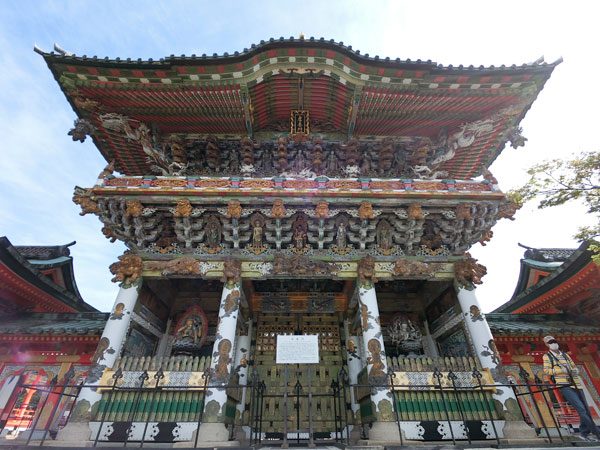
Next, I headed to the Kosanji Temple (entrance: 1,400 JPY/S$17), and while this temple is a bit expensive to enter, man it’s quite the experience. This crazy temple complex was built by a dutiful son as an act of filial piety to his mother, and I was simultaneously awed and bewildered by the mishmash of styles and architecture.
Not to be missed at Kosanji: the cool, dank underground gates of hell tunnels where there are scenes depicted of how sinners are tortured in hell. You are right if you think it sounds like Singapore’s Haw Par Villa complex, but somehow the Japanese version seemed a little more tasteful and slightly less garish. One particularly creepy spot is the end stairway as you exit, where there are what feels like 10,000 Buddha statues staring at you, and you finally emerge at the feet of the giant Guanyin. See the video clip below to judge for yourself:

Shiomachi Street is an old shopping street that connects Kosanji to the Setoda Port area, but by the time I cycled down it in the evening, many of the stalls were closing up.
Another highlight to see if you have the time are the many citrus orchards which are famous products of the Seto Inland Sea area, but those are on the east side of Ikuchijima and I didn’t bother cycling there.
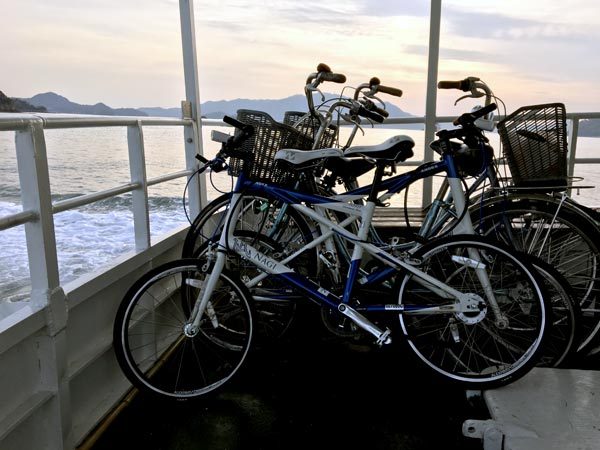
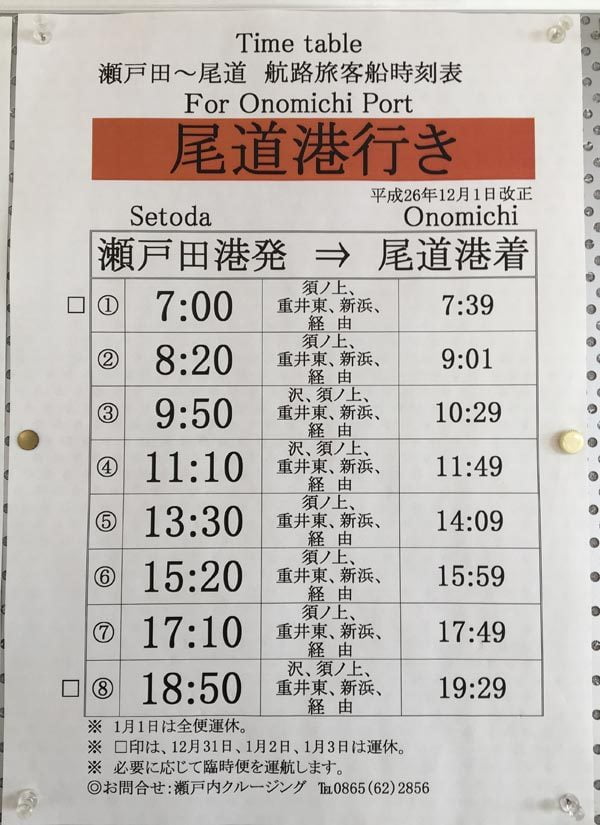
So because of my weird route plan, I stopped at Setoda Port at the end of Day 1 and caught the ferry back to Onomichi. It was pretty cool zooming by all the places that I cycled through just hours before, though it also felt like I negated all the work it took me to get to Setoda.
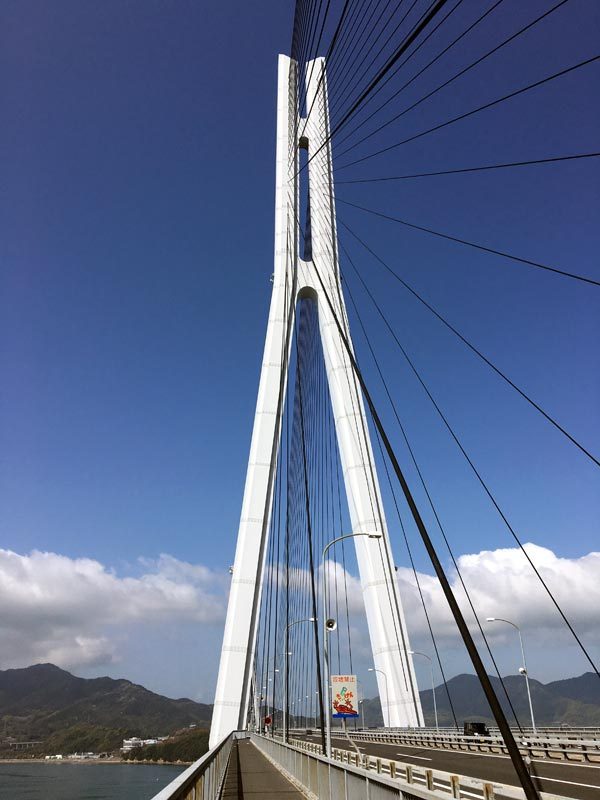
On Day 2, I took the ferry back to Ikuchijima and stayed over at Setoda Private Hostel, which you can read more about in the accommodation section. When I woke up on Day 3, I walked from my guesthouse to Setoda Sunset Beach the next day to rent my bike and continue on my journey. I started out at around 9am after the bike rental centre opened, and it was a pretty short distance to the next bridge – Tatara Bridge, a cable bridge connecting Ikuchijima to Omishima.
Omishima 大三島
This is perhaps the largest island of the entire Shimanami Kaido stretch, but the recommended route actually only takes you through a very small portion of it on the southeast portion of the island. You could easily spend a day exploring this island on its own, and it has a bunch of contemporary art museums on the west coast I would love to have checked out if I had the time:
- Toyo Ito Museum
- Tokoro Sculpture Museum
- Omishima Museum of Contemporary Art
- Ken Iwata Mother and Child Museum
But I wasn’t that confident in being able to complete the route by the end time of 5pm when I needed to return the bike at the Imabari JR station, so I decided to just stick to the recommended route, which turned out to be a sound decision. I am seriously a super slow cyclist.
Hakatajima 伯方島
Similar to Omishima, the recommended route brings you through a very tiny portion of the southwest end of Hakatajima. I stopped at the rest stop here for lunch and didn’t do much else. Hirakiyama is supposed to be a nice park for Sakura viewing and this area is also famous for sea salt making – but you will have to head around to the eastern side to check out the salt factory and salt lagoons.

Oshima 大島
Note: Oshima is not to be mixed up with the other island on the route called Omishima, or Izu Oshima way out in the Philippine Sea. This Oshima island is the final island on the Shimanami Kaido before you hit the Shikoku land mass and the recommended route brings you right through the middle of the island. Alternative routes are longer and skirt the coast if you prefer sea views.
I was pretty tired by this time and felt like I spent the longest time just cycling through the island. All I wanted was to get to my end point, so again not much sightseeing here, but some popular stops here include the Yoshiumi Rose Park with over 400 different types of roses, the Murakami Suigun Museum for those interested in maritime history, and Mount Kiro Observatory Park which has a great view of the bridge but ONLY if you are willing to make a super steep climb.
My tip: take a good rest before taking the bridge to Imabari – your last bridge is actually 3 bridges combined together to form a 4+km long stretch called the Kurushima-Kaikyo Bridges.
Imabari 今治市
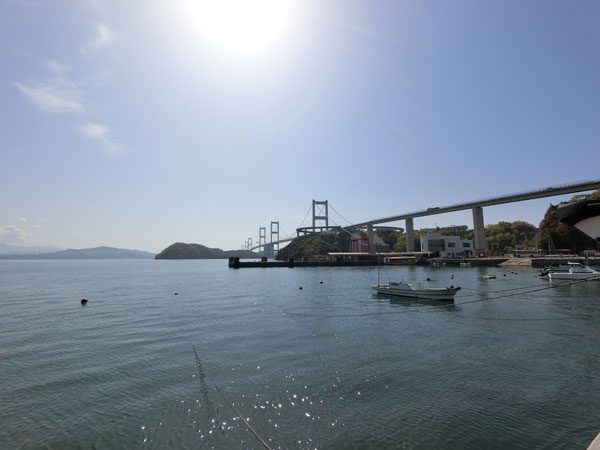
Finally! Once you make it across the super long bridge and hit Imabari, you are rewarded with a lovely downward sloping loop ramp that brings you to Itoyama Park or Sunrise Itoyama where the bike kiosks are. I recommend finishing your cycling leg on a high at this spot where you can take a rest and get some great pix of the sea. The closest train station here is Hashihama station, where you can catch a train to the main JR Imabari station.
What I did was continue cycling on to JR Imabari station, and let me just say it is not particularly noteworthy cycling through increasingly crowded town traffic and at some point that familiar blue line suddenly disappears (or I might have gotten lost). In my opinion, it’s a bit of a downer to finish your epic ride wheeling your bike into a rather crowded bike lot under the railway tracks instead of at Sunrise Itoyama with its lovely view.
And there you have it folks, that was 76km and 2 days worth of cycling compressed into this one post :) I still can’t believe I actually finished this ride.
Logistics to consider
Taking the Ferry
I mentioned above that in the evening of Day 1, I took the ferry from Setoda back to Onomichi and brought my bike with me. This is probably suitable for people who just want to do a cycling day trip and return back to Onomichi.

There are other ferry options, but you will need to look that up for yourself. Same goes for the buses, which are an option if you decide to return your bike at the stations along the way. The best info can be found on the Shimanami website here.
How long does it take to cycle the Shimanami Kaido?
Given that I’m a pretty unseasoned cyclist, I decided to give myself 2 days to complete the route, and even then I found that I might have liked to have given myself another day or two perhaps so I could explore the islands and stop at more spots along the way.
Based on the timestamps from my iphone pix, here’s a look at my cycling times across the islands including their respective bridges.
Leg 1
- Mukushima > Innoshima : 9am – 1030am (~1.5 hours)
- Innoshima > Ikuchijima : 1030am – 130pm (~3 hours, I had a lunch break too)
- Ikuchijima > Setoda : 130pm – 5pm (~3.5 hours, visited 2 tourist spots – without visiting any spots, I would have finished cycling around 35km in about 6 hours)
Leg 2
- Setoda > Omishima : 9am – 10am (~1 hour)
- Omishima > Hakatajima : 10am – 11am (~1 hour)
- Hakatajima > Oshima : 11am – 1145am (~45 mins)
- Oshima > Imabari : 1145am – 345pm (~4 hours – I took a lunch break at the start, and then an ice cream break before the long bridge. Apparently I rested a lot longer than I thought I would!)
- Sunrise Itoyama > Imabari JR Station : 345pm – 445pm (~1 hour – I had to reach before 5pm! I definitely was cycling much more slowly compared to the first leg)
I definitely wouldn’t have had been able to finish the whole route in a day as I am the world’s slowest cyclist and I take a gazillion breaks, but there are people who can, so it really depends on your own ability.
Bicycle rental
If you don’t intend to bring your own bicycle, rest assured that bike rental is easy and cheap as well. For most bikes, it costs just 1,000 JPY per day for general bikes. You place an additional 1,000 JPY deposit on top of this, which you will get back if you return the bike to the same place where you rented it from. If you drop your bike off at another station along the way, then the deposit is forfeited, so if you go from Onomichi to Imabari it will cost you 2,000 JPY in total.
The Shimanami Kaido route is frequented by a lot of travellers, so the sign up forms have English translations and the bike staff are adept with dealing with non-Japanese speaking tourists. The form usually requires you to state your estimated start and end destination, but I don’t think it’s a big deal if you end up abandoning your plan.
There are bike rental stations on almost every island, though you are most likely to rent your bike from Onomichi (7am – 6pm) or Sunrise Itoyama at Imabari (8am – 8pm Apr-Sep, closes at 5pm from Oct-Mar) depending on where you begin your journey. The other stations are smaller and if you get tired along the way and want to give up cycling, you can drop your bike off at these stations from 9am to 5pm. A more comprehensive list can be found here.
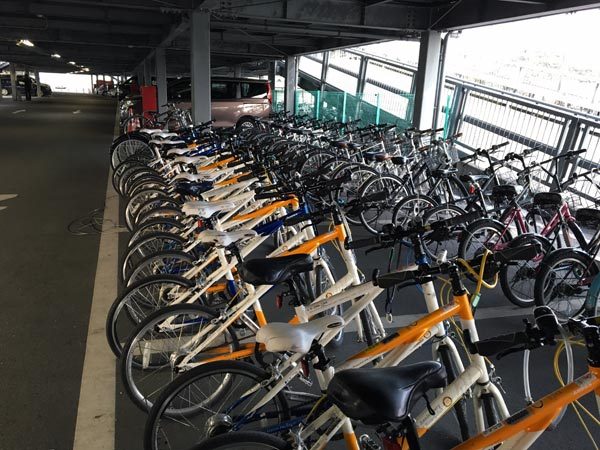
I recommend getting a cross bike, or at least one with the ability to change gears to help you tackle the slopes. I honestly don’t know how some of these ladies leisurely pedaling by on the mamachari bikes (that’s what they call the heavier landbikes with the wicker baskets) managed it because I was dying even when equipped with a 7-speed gear.
For more serious bikers, check out the Giant bike rental stores instead. Bike rental there is naturally more expensive, but you get more pro selections as compared to the general bikes. For most general bikers I don’t think you need to splurge on this, but it really is up to you.
Where to stay
Onomichi
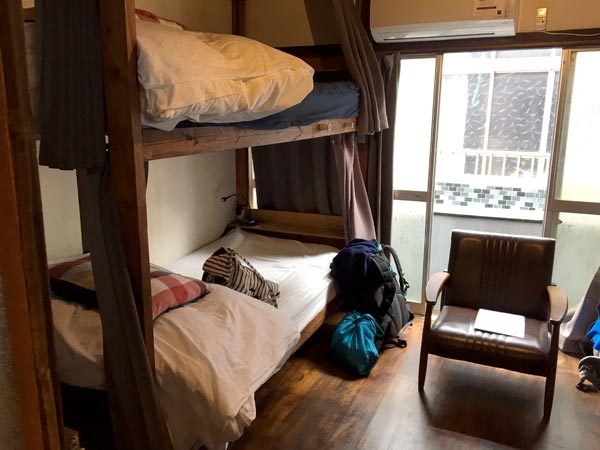
I stayed at a cute hostel called Guesthouse Yadocurly [booking.com affiliate link] for 3 nights at 2,800 JPY/night for a 4-bed mixed dorm room.
A highlight of the hostel what that they arranged dinner every night depending on interest and numbers. You let the staff know by 3-4pm whether you would be doing dinner and contribute a small sum (mine was 500 JPY) and they prepare dinner for you. It’s a great way to get to know new folk – I had quite a big group at mine eating udon, sashimi and temaki handrolls but locals and tourists alike that day were mostly Japanese speaking!

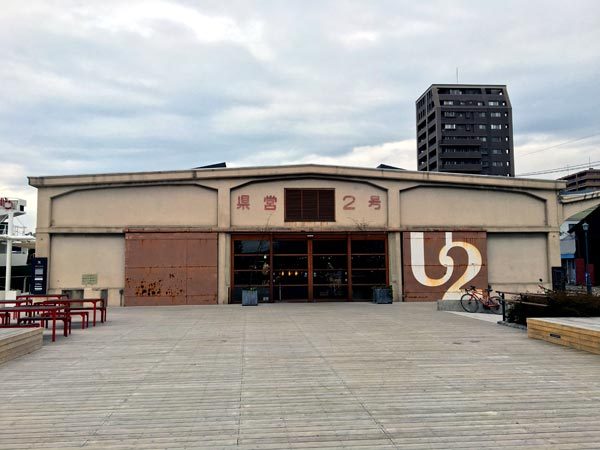
Another popular stay option if you’re travelling as a pair and have a bit more budget is Hotel Cycle, which is a super hip hotel in this old warehouse building by the wharf. Ridiculously hipster but very cool vibe. The cafe, bakery and restaurant are great places to hang out at on a chill afternoon.
Ikuchijima
My overnight stay was booked at Setoda Private Hostel 瀬戸田垂水温泉 or Setoda Tarumi Onsen. It cost 3,000 JPY/night for the room only, but I included dinner and breakfast for an additional 1,800 JPY in total because I didn’t want the hassle of sorting out my meals.
The guesthouse is a short walk from Setoda Sunset Beach which is convenient if you are cycling the route, but without a bicycle, you need a car ride to get you from Setoda Port to this little hostel. It was a small place but also where I had a private room with ensuite toilet to myself for the first time that trip.
And also a huge bonus – the hostel has its own private onsen that overlooks Sunset Beach! Sadly the weather was really rainy when I was there, but the onsen itself is pretty nice with its own landscaping and built-in rocks, and I can imagine the view being quite impressive on a good day.
Unfortunately, while they do have a website, the only way to make a booking is by calling, and they don’t speak English. I had a Japanese-speaking friend call and make a booking for me.
Luggage Forwarding
The good news is that you don’t have to return to your starting point to pick up your luggage if you want to continue on your journey. There is a very easy to use luggage forwarding service Takkyubin located near the Onomichi ferry area (look for a table inside the ferry waiting lounge) that will send your bags to your next destination ahead of you
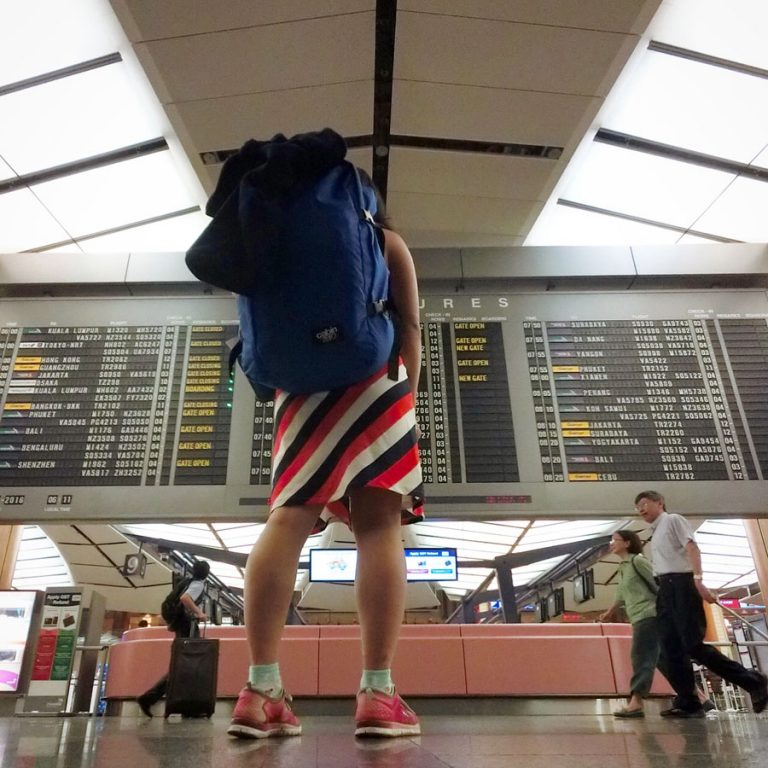
I sent my large backpack to my Matsuyama hostel Sen Guesthouse (apparently a very popular destination, the lady had all the details on hand without me having to provide them, she also spoke pretty good English) – you just need to let them know the destination and when you expect to arrive there. My 44L CabinZero backpack (estimated 10kg+) cost me 1,412 JPY (around S$17) to forward, though the actual price will depend on the weight, size and distance of your bag.
Total Cost
Based on my original 2D1N itinerary:
- Bike Rental (2,000 JPY for 2 days + 1,000 non-refundable deposit) = 3,000 JPY
- Bag Forwarding = 1,412 JPY
- Ferry to Mukushima = 110 JPY
- 1N stay at Setoda Private Hostel + Dinner + Breakfast = 4,800 JPY
My revised 3D2N itinerary included these additional costs:
- Ferry Transfer (Setoda to Onomichi) = 1,330 JPY
- Ferry Transfer (Onomichi to Setoda) = 1,030 JPY
- 1N stay at Guesthouse Yadocurly (dorm room 4 pax) = 2,800 JPY
There are toll fees at the bridges for motor vehicles, and initially about 300 JPY worth of tolls for cyclists in total, but these have been waived for now.
My cycling tips for the amateur
Here’s what I learned from my Shimanami Kaido cycling adventure.
Crossing bridges involves slopes
All the bridges are elevated, so any time you encounter a bridge, expect to find yourself cycling at least 1km worth of upward slope to get to the top of the bridges. To be fair, the slopes are fairly gentle and there are specially designed for cyclists separate from the one the cars use, but if you aren’t a very pro cyclist (aka ME), you are going to feel every single additional slope degree burning into your muscles. I stopped very, very, very frequently along the slopes as I cycled upwards. Ostensibly my excuse was to take pix of the view and the bridges, but it was mostly to catch my breath and rest my aching muscles.
Your seat height is key to a comfortable ride
Adjust your seat higher so that your leg can straighten fully on the down pedal. This way, your leg doesn’t get cramped up and cycling is less painful. It does however mean that you’re on tiptoe when you come to a stop, so I generally try to find a kerb or handrail to help balance when I stop.
What to wear when cycling
The weather was cool in April, so wearing long sleeves and pants to protect from the sun was not a hardship for me, but it may be harder to do so when it’s sweltering. I suggest doing the Asian thing and covering up rather than rely purely on sunblock because you’re likely to be sweating a fair bit which will negate all the sunblock you pile on, and you are very exposed to the elements most of the time.
Sunblock is a must
Exposed areas you need to apply sunblock to frequently: Your face (sigh, the sunglasses marks I ended up with), back of your neck (I wore a buff that kept my hair back, soaked up sweat and kept my scalp from getting sunburned), back of your hands which you might not realise are facing the sun directly most of the time – some people wore gloves, but I recommend wearing those long sleeved jogging jackets with the thumb hooks (I really like those Airism jackets from Uniqlo).
Food and Drink
You don’t have to worry about going hungry or needing the loo because there are lots of convenience stores along the way, and you can usually find a large rest stop close to the bridge areas. I love Japanese kombinis~ stay hydrated!
Anyone else been on the Shimanami Kaido with stories to share?
There are a ton of things for you to do in Japan even if you don’t like to cycle – see all my Japan posts for more inspiration. If you like the Seto Inland Sea area, check out the Setouchi Triennale and the art island Naoshima.












Very informative post. Thanks heaps!!!
glad you found it helpful!
Hi! Thank you for your guide, it’s quite amazing! I’m actually planning a trip on Shimanami Kaido as well but i still have a few doubts XD You advice on taking the ferry as a return from Setoda port back to Onomichi (but i can’t find any recent updated schedule.. only one i could find was dated 2014.. do you have maybe any better link i can look?) buuut, question is, do you think a slow biker (believe me, i probably am slower than you) could manage to get there (almost half-way through of the whole bridge) in a day? I’m asking because my time is limited and i’m supposed to take a 1.5 hour train to go back to my hotel after i get off the ferry and return the rendet bike..
Also i gathered that there are quite a few ports along the way in the various islands, do they all offer travel service back to Onomichi by ferry, by any chance? Because i couldn’t find any schedule table for these either.. Any inside tip?
Super thanks and have a great day <3
Hi Haru, I was there in 2016 so that’s the best info I have for you, if I’d found any additional info it’s all linked in the post already… You could probably cycle all the way in a day if you don’t make any long stops or detours from the main path and start quite early, might not be the best idea if you actually want to see some of the sights though.
Really nice post! It helps me plan my trip quite a bit. I’m planning to do it in 3 days in March to explore a bit more and have a day for potential rain. You said you finished in Imabari JR Station, so just to be sure, I can return my rental bike there? Thank you very much :)
you should be able to, you can check at the place where you rent your bike from, but it shouldn’t be a problem!
Hello! Thank you so much for this fantastic post – I’m researching into the bike ride now (however only doing half a day) and I didn’t know about the Shiomachi Street so will put that on the list.
Hope you enjoy the ride when you make it! :)
Oh wow I literally stayed in the same exact room as you at setoda. I wish I knew to adjust my bike seat to be higher though, my butt was really *really* sore from the cycling, (I had to mentally brace myself every time I went over a bump in the road, especially near the end when I didn’t have the strength to lift myself off the seat anymore) (Not having touched a bike in at least 10 years didn’t help either). I wish I could’ve seen more of ōshima/ōmishima but the longer path around the island seemed too intimidating
heh adjusting the bike seat does make a lot of difference when you ride for longer distances, but the awesome thing is you completed anyway so high fives!
I’m with you on seeing more of the islands, but man at some point I was just focused on finishing more than actual sightseeing… maybe if I had decided to spend more time on the islands!
hello
thanks for sharing this, really informative & useful.
i live in singapore too and planning to cycle solo along shimanami kaido on end of oct/early nov (this is my first ever trip to japan btw).
as i will bring my own bike, my plan is to fly to osaka, reach early morning and then take train to onomichi (maybe spend 1-2 days here) and cycle to imabari (may take 2 legs — i want to visit some museums & attractions along the way.
from imabari then I will take ferry back to osaka (i believe bicycle no need to be dismantled on board ferry), cycle around osaka and back to singapore.
what do you think –any suggestions?
thanks again!
cheers.
Sounds like an epic first trip to Japan! The museums on the islands are pretty cool, I think the ones on Ikuchijima (Kosanji reminds me a bit of Haw Par Villa, Hirayama is a famous Japanese artist) are definitely worth seeing, and I wish I had more time to see those on Omishima for myself. I basically wanted to just cycle through by the shortest route, but you sound like a more pro cyclist than me so I think it’s nice to take the time to explore the islands more thoroughly.
I’ve never taken that ferry back to Osaka but it sounds like a nice alternative after taking the train. Around the Kansai area near Osaka there’s lots to see as well.
It sounds like a nice itinerary, have fun :)
..the main reason that i will be taking ferry back to osaka is to save time dismantling & assembling my bike –since i will cycle around in osaka as well.
i’m not a pro btw, just love to ride but never done any touring –and this trip is one of my 2018 resolutions :)
cheers!
I bet you’ll have a blast, the Shimanami Kaido can be tiring at points but the scenery is totally worth the effort :) happy travelling!
Thanks for the write-up. Will be doing it in late Apr or early May 2018. How’s the weather? Do you bring your “backpack” along ? as need to stay overnight in between.
I carried a daypack with me with a change of clothes to stay overnight in Setoda, but there was a luggage forwarding service for my bigger backpack that went straight to my hostel at Matsuyama!
Hi! Thanks for your post!!! The most understandable information I have read about Shimanami Kaido!
On March I will be traveling in Japan as my second time. I will travel withe a friend and we want to add this bike experience! I´m a “beginner” biker. :)
My plan is to begin in Onomichi and finish in Imabari in 2D/1N, sleeping in Setoda.
I have some questions. I hope you can help me:
1) If I want to add a day, how is it better to separate the legs so than each day will be more relax and let me visit mor spots?
2) Is it easy to get place in this accomodations at the arrival or it is necessary to book in advance?
3) After Shimanami Kaido, my plan is continue to Kyushu Island (Kumamoto). I can understand how can I continue within returning to Onomichi… Is it the only option? Do you know if I go to Matsuyima I can cross to take the Sanyo Shinkasen? I don´t understand the conections. I will have the JR Pass.
Many thanks and best regards,
Magrimu
Hi Magrimu,
Glad you found it useful, have an awesome trip! I loved that experience. I’ll try and answer your questions but I’m not sure how helpful they are, you might get better answers from Google than from me :P
1) I did 2D1N as well, but I guess if you want to cycle less, then maybe your 2nd night accom should be closer to or at Imabari instead of Setoda? There were a bunch of museums closer to Imabari that I didn’t manage to check out. I haven’t quite done the research to see where else you can stay though. Otherwise maybe just stay 2 nights in Setoda and use that as a base to explore from.
2) I had a Japanese speaking friend help me call up the place I stayed at to make a booking. I think it depends what time of the year you’re there? It wasn’t crowded when I was there so I think I would have been able to rock up and get a room, but it really depends on when you go. Googling Shimanami Kaido Accommodation pulled up a bunch of options which might be helpful for you if you want to stay somewhere you can make an advanced booking at and don’t speak Japanese.
3) From Imabari, I took the train to Matsuyama, and from there I took a ferry to Hiroshima. From Hiroshima I then took the Shinkansen to Fukuoka on Kyushu. – I don’t think there are any train options between Shikoku and Chugoku as far as I remember! Think the only other way is to head back to Onomichi by ferry across the sea so you don’t have to cycle again…
Hello,
Your blog is really helpful for my upcoming trip to Japan. Cycling in Shimanami Kaido is one of my plans. Regarding to take Ferry from Setoda Port, do I need to book the ticket via online or can I buy in advance?
Thank you :)
I just bought all my tickets at the port, not sure if you can buy them beforehand! But enjoy cycling! :)
Thank you :)
Hi. do they do same-day luggage forwarding from onomichi to imabari?
I think they do! Not sure if the cost is the same though or whether it might cost more because it’s a faster delivery, but it’s doable :)
Wonderful post! I loved cycling the Shimanami Kaido. We actually did it in one day, which is entirely possible. It wasn’t rushed at all… but we were definitely tired. I would say that it is important to bring snacks though as conbini get a further and in between as you go along. We were starving at one point and had to wait a few hours… Hope you don’t mind but I linked your blog on my own about the best islands in Japan. Thanks again!
Tam
Heh I’m not much of a cyclist so I think doing it in a day might be really rough on me at least :p but yeah I did run into others who finished it in a day as well so as you said, definitely possible (just not for me haha)
Mh good memories of Combinis :)
Hi, we love your blog and would like to nominate it for the “Versatile Blogger Award”. Please visit http://www.theothersideforever.com/versatile-blogger-award for more information :)
Thanks but I’m probably going to pass on this because golly just keeping up with my own content is enough work right now, but thank you anyway!
So much great information about the bike trail! I really, really loved my one day biking it. Definitely exhausting but seeing all the bridges and local life were worth it. I love all your details and pictures in this blog. Hope you don’t mind but I linked your blog on my own local’s activity guide to Japan. Thanks again!
Tam @ http://freshcoffeestains.com/japan-activity-guide/
thank you for the link! and glad you had fun biking the route too because while it’s super tiring, it is crazy beautiful and definitely a great experience :)
I did the same route in March 2016, and I stayed in Setoda priva guesthouse too. I still remember the shrine next to it, the abandoned bus which was painted with many graffitti, the dolls right there and the free oranges. It was a great experience, I did it in one day and a half at medium pace. I totally recommend this to everyone.
super awesome that just reading your comment brings back those memories for me so vividly! Thanks for sharing :)
Very helpful & informative .Thanks .
Hi
Your post is so helpful! Thanks!
I only have a day in the area… is leg 1 or leg 2 better in terms of views and ease? I am a beginner cyclist.
Hi Lee! I’m very much a novice cyclist too :)
in terms of view, the entire route is scenic, but I think you have more stuff to see along the leg 2 route just by virtue of the island sizes, but that also means possibly a lot more cycling. However in terms of convenience, leg 1 where you start from Onomichi is more convenient to get to than Imabari, especially if you are coming in from the major cities like Osaka or Tokyo. I’d suggest for you to start from Onomichi though if you’re a first timer as that seems to be what most people do!
Hi, I am planning to do the ride in the 3rd week of October and will be riding alone too. I have found your sharing to be very helpful. Can I know how you booked Setoda Private Hotel as the website does not have an email to write into? I intend to travel to Imabari first and ride from Imabari to Onomichi.
thank you very much for sharing:)
Hi Anne, I had a friend who speaks Japanese help me call the hotel via phone to make the arrangements – maybe you could get someone from one of your hotels to help you make that booking by phone as well? Most people are generally quite helpful :)
Excited for you! You really don’t feel that alone on that trail because you’ll see so many other cyclists as well and be distracted by the amazing scenery…
Ah, I see. Ok, I will ask a Japanese friend to do it for me too. Pity they do not have email add.
Thankyou!
Thank you.It is very helpful. I’m just thinking about doing this route in October.
Glad you found it useful! It really is a beautiful route and I think the weather in October should be quite nice for this :)